

Activity › Forums › Questions & Troubleshooting › Setup & Installation › Uploading a code to Controllino MINI
-
Uploading a code to Controllino MINI
-

Hello Prisma! Yes. Look:
When you press on the Upload button at the Arduino IDE (after installing the drivers and plugins of Controllino to the IDE, what you already did), the IDE first compiles your code again, and if there are no errors, it uploads it to the Controllino.
Since the pins to transmit the code into the Controllino (into the processor) are the same than TX and RX of the RS232 Serial port (TX = Transmit, RX = Receive) and some orange LED’s are connected also to the same pins, they will blink for any communication between your PC and the Controllino.
After looking at the blinking of this LED’s, you can be sure that the code is uploaded.
And, if you want more, you can connect the Controllino to the supply (batteries, transformators, etc) and look if it does what you wrote on your code.
Sure it exist some software to compare the contect of the Controllino with your compiled code. But I think it isn’t necessary.
Wbr,
Alfredo
-

Hi Prisma, in addition to the answer before (thanks ABeTEC!): if you get no errors in the Arduino IDE after uploading and it says “Done uploading.” in the green field on the bottom of the IDE…
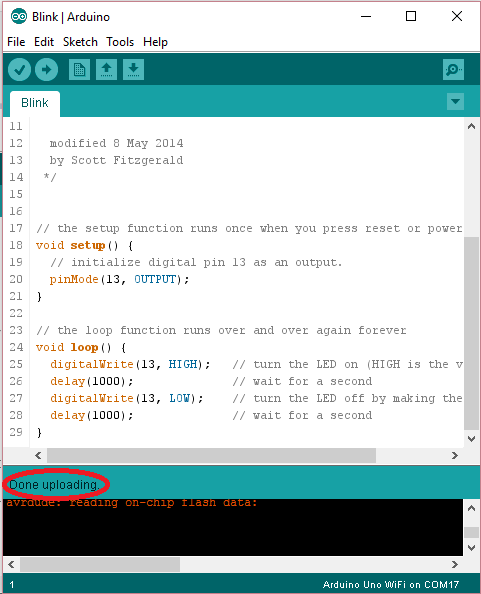
[img]https://www.arduino.cc/en/uploads/Guide/Arduino_UNO_WiFi_sketch_completed.png [/img] …then you can be almost sure that everything went fine. Just try it out with some simple code, like the LED blink example.
Don’t forget to use Pin #4 instead of #13 like seen in the screenshot or in the Blink example from Arduino IDE.Also, check out the Tutorials section on the CONTROLLINO homepage for some examples and how-tos to get started quickly.
Log in to reply.